Happy Friday everyone. I'm so happy it's the weekend...next week I'll be headed to a weekend long crop! WOOT WOOT!
I put this card together this week for your viewing pleasure.
I used the I'm Your Friend senti single from Creative Vision. I love this stamp. It's so fun and sassy, fits me and a lot of my friends well.
I used some older My Minds Eye paper with robots on it for this card as well as some green ribbon. I inked the senti and added some liquid pearls. As always, everything on this card has pop dots and dimension.
Thanks for stopping by and checking out my card today. Have a great weekend!
Showing posts with label Chelsea. Show all posts
Friday, September 30, 2011
Friday, May 14, 2010
Chelsea's last post with CCS
Here we are...Friday again! Great to see you all! Chelsea here for my final weekly posting. I'm so sad to go but so honored to have been on this design team. Laura, thank you for this opportunity. Olga, Jenny and Shelly thank you for being such wonderful team mates and so supportive. This has been an amazing experience! My only complaint is that it went by way to fast!
Here is a little Q&A with Chelsea
Tell us something we don't know about you
I am a hoarder. I have more paper then I'll ever use but when I find some I like, I have to have it.
Where do you get your creative inspiration every week?
I get my inspiration from sketches or challenges all over the blogging/crafting world.
What has been your best experience as part of DT3?
My best experience was the support from the other girls and from Laura.
I'll continue to blog and work on stuff for the other design team I'm on and pick up some challanges that
I've been meaning to get involved with.What is your favorite CCS Stamp?
Hands down it's the Sassy Birthday 2
My card for today I used the In The Arms of Jesus set from Creative Clear Stamps.
Paper is by October Afternoon from the Farm Fresh collection called Hay Barn. I'm hooked on plaids and stripes when it comes to paper if you can't tell lately. Hay Barn is another paper with a B side. The cross I paper pieced from the B side of some Bo-Bunny camping paper. It was large wood grain but I kinda lost that look when I cut it down. Oh well, ya'll get the idea right?
I inked some clouds and the grass by masking my colored image of Miss Hunny.
Added my sentiment and one thing I love about the clear acrylic stamps is that they are bendy and you can shape them to fit what you want. In this case, I made them roundish to boarder the circle. (Don't cha just love my made up words, Bendy and Roundish?)
I also stamped the flower from the same set in the corner and re-stamped and paper pieced the flower, center and leaves and popped them up. Added some faux stitching around what seams like everything here and called it finished.
Thanks for stopping by and have a great weekend! Don't forget to stop back on Sunday and play along with the sketch!
FROM LAURA'S LAPTOP
Chelsea, Chelsea, Chelsea....she is the rainbow on DT3 - full of warmth and color, and can always make you smile! Did I ever mention she shares my sassy side? She sure does! She is Always full of energy and is great to joke around with! I have COMPLETELY enjoyed having her on my team the past 8 weeks. I will miss friday mornings - grabbing my cup of coffee and sitting down to see what kind of fun she was up to here on the CCS blog.
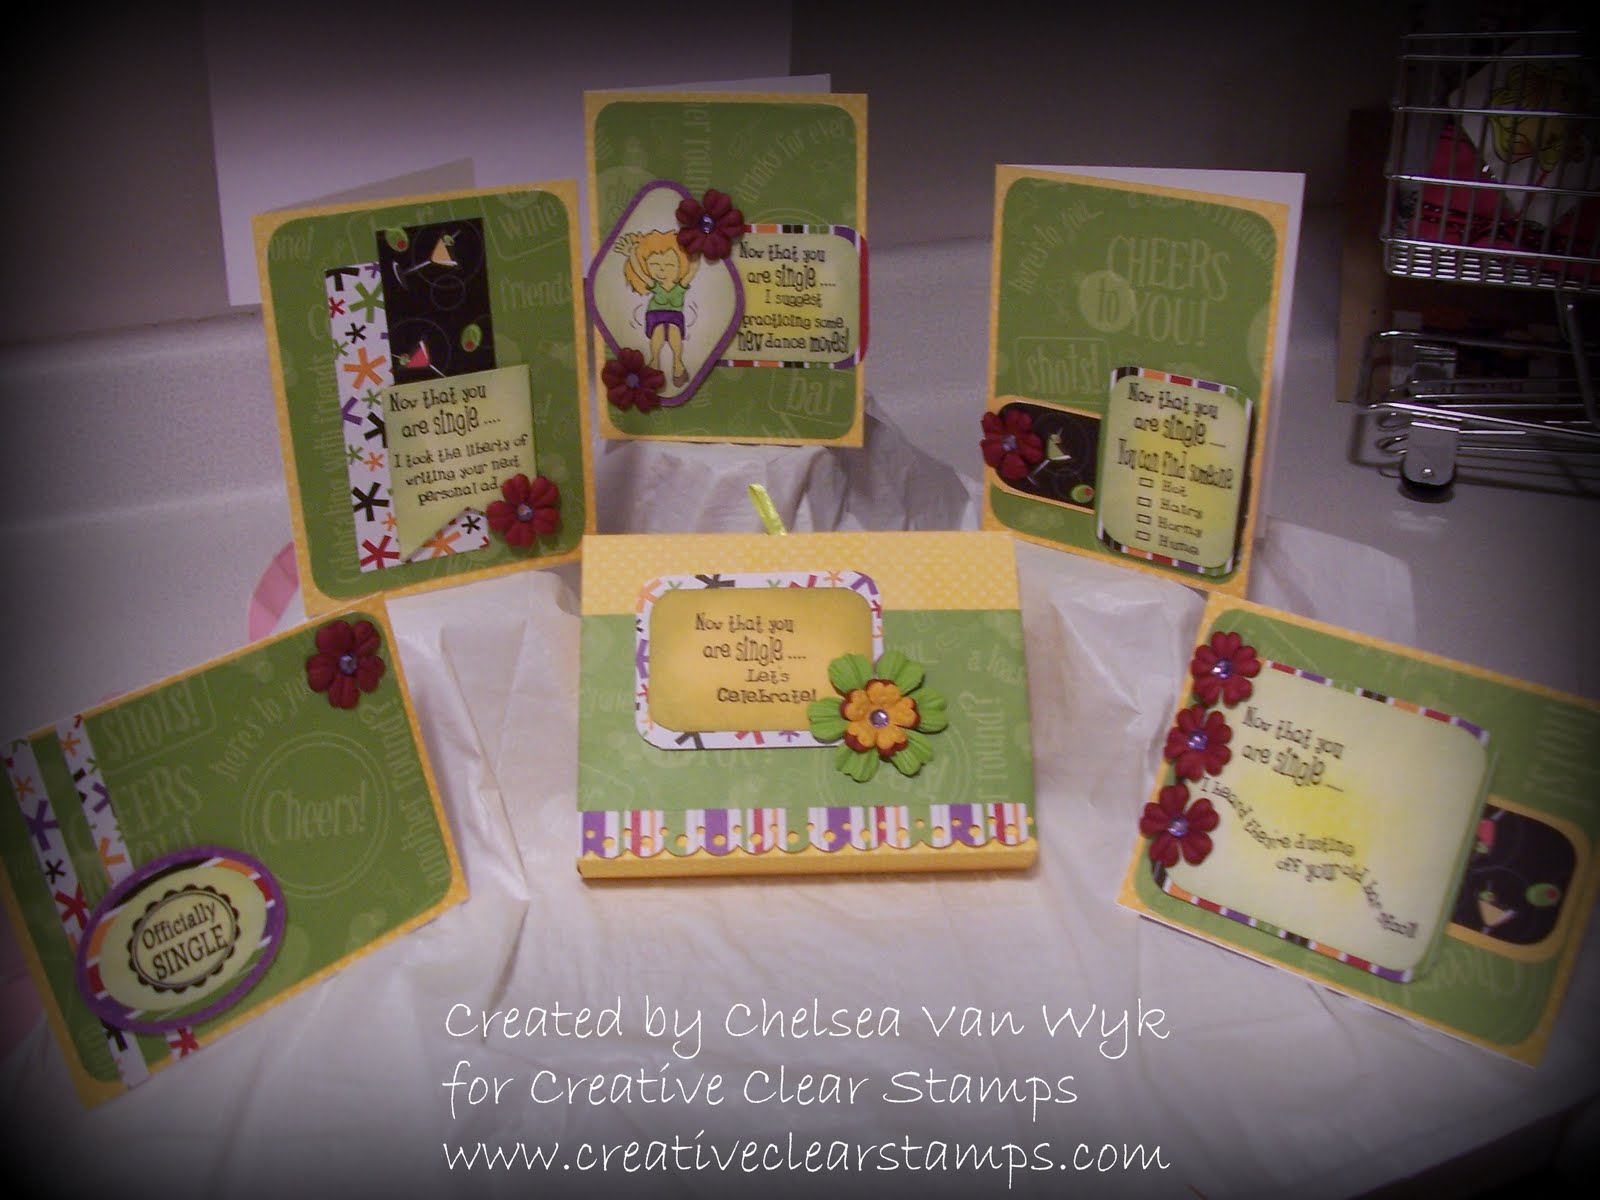
This is my personal favorite project from Chelsea. Without a doubt this one shows off her personality and style the best (to me anyway). HOW fun is this card?
Thanks for being on DT3 Chelsea!
I look forward to watching you grow as a paper crafter,
and following you on your blog to the next great crafting adventure!
I look forward to watching you grow as a paper crafter,
and following you on your blog to the next great crafting adventure!
Friday, May 7, 2010
Sassy Birthday 2
Here we are...Friday again! Chelsea here and it's great to see you all! Sadly I'm stuck at work all day today! :( But I have tomorrow off so I'm gonna enjoy that. Moving on...my card for today I used the Sassy Birthday 2 set from Creative Clear Stamps. I'm totally in love with this set.
My papers are from Little Yellow Bicycle, it's their Lucky collection. Another B side paper, I did all the matting in the B side of the paper. I used some Bloom Core'dinations paper for the blue strip on the left side. I used a vintage brad from Creative Charms on the blue paper as well but it had a diamond rhinestone that I popped off and added the green to. Also added some green bling at the bottom of the sentiment.
I crumpled and sanded the blue cardstock. I just love this Core'dinations stuff. I added a close up of the sentiment but you still can't tell, but I inked the edges in some Distress Ink in Shabby Shutters then sprayed it with some Black Magic Glimmer Mist which has a hint of gold sparkle in it.
Don't forget to stop back Sunday for the sketch challenge from Creative Clear Stamps and have a Fab weekend!!!
Friday, April 30, 2010
Happy Sassy Birthday!
FYI: Let's Make A Deal game is up and running, go HERE to play. Because of all the link issues we're gonna let you play even longer (but just once). You can play until 7PM central time. Make sure YOU make a deal! Great Prizes!!
Happy Friday ya'll! Chelsea here and I think the last 2 Friday's at work with my 1/2 day spoiled me so I took today off from work and I'm doing nothing. Planning on movies and house cleaning and of course STAMPING!!
I absolutely LOVE this Sassy Birthday 2 set of stamps that was just released over at Creative Clear Stamps. It totally had my name written all over it. So naturally I had to use it again today for my Fantastic Friday Post!
I used papers from My Minds Eye and tried to give this a nice masculine feel. I'm really beginning to like paper with a B side to it as well. This is from the Quite Contrary line and the papers are Delight and Curious. I used a few brown eyelets in the corners of the brown dot paper. It had been awhile since I had used eyelets. I also used some of the brown shimmer paper from Cuttlebug. I embossed that with the argyle folder.
The tan paper the sentiment is on is Bo-Bunny's dot paper. I used Vintage Photo Distress Ink to stamp with and inked the edges with the same (however, it looks like there may have been some green leftover on my sponge).
Have a great weekend!!
Monday, April 26, 2010
CCS Birthday Bash and a Tutorial
Hello kids, Chelsea here...as you saw in my Friday posting, my latest and greatest tutorial is for the super cute post it note holder. This can be kept by the phone for messages or whatever works for you.
What you will need:
A strong acrylic frame like the one pictures below
score tape
card stock and patterned paper
whatever other flat embellies you would like
My frame is for a 4X6 photo. I removed the insert and cut my card stock and patterned paper to the same size. Decorated the 4X6 card stock so it matched my card, adding some of the raffia around the top.
I added score tape to the back of my Post-It notes because the Post-It sticky just isn't enough to hold it.
Then I stuck it to my frame.
You can add a bit of Velcro to the top or bottom of you would like and make one of the cute little RSVP Pens to match that will attach with the Velcro.
Told you this was super easy!! Now go get yourself an acrylic frame. And don't be like me and forget to stamp some cute Creative Clear Stamps images on your Post-It notes.
Labels:
Chelsea,
Hello Hunny,
Post-It Note Holder,
Tutorial
Friday, April 23, 2010
Hello Hunny
Spring is here and summer is just around the corner and this is a fabulous Friday! I would rather be out enjoying the weather then here at work. Oh well, what can I do? Need to work to buy more supplies right? PLUS, I'm off at noon and I'm headed to another scrap weekend. WOO HOO! How lucky am I?
Today my Fabulous Friday post is for a card and matching Post-It note holder (which will be my next tutorial). They are super cute and super easy.
But 1st, my card...I used some more of that Core'dinations card stock I love! I sanded the edges to give it a more country look. I used Material Girl paper by Cosmo Cricket called Calico. I used the Hello Hunny set for my sentiment and my little corner flourish. I added little raffia to this card, I love how just a little something like that gives this such a country look. I inked the top note cut with Worn Lipstick Distress Ink and after crumpling up the Calico paper, I inked it a bit too.
Friday, April 16, 2010
In the Arms of Jesus
Happy Friday everyone! This is Chelsea and I'm super excited, I will be attending a scrapbook weekend all weekend and I can't wait!! Anyone wanna join me? You have to bring the wine and chocolates!
For my Fabulous Friday posting today, I used the set In the Arms of Jesus. I love this sentiment. It's very touching.
I used some papers from My Minds Eye, Market 29 I think. I loved how masculine the paper is. I embossed the one panel with the stars folder from cuttlebug and added a few pearls in bronze and a pearl brad. I inked the edges just a smidge with some Vintage Photo Distress Ink.
Friday, April 9, 2010
Officially Single...
Well actually I have been for awhile now but we're not going to get into my romantic life (or lack there of)...This is Chelsea and we're gonna jump right into to this fun project I did for today for CCS which uses the set called Officially Single. It is this set that got me hooked on CCS. It's a great set and super funny! I have a few friends that could get a good laugh after a break up with some of these cards...
I initially started with the idea of doing 1 card for this set but they all kept coming together so nicely that I just kept making cards...well with 5 cards, I thought to myself, hmmm, self, I think you need to make one of those cute little boxes to store this set of cards in so....
I used paper from Creative Imaginations from a few years ago. I'm pretty sure it's been discontinued since I purchased it. I paired it with some dot card stock from Bo-Bunny and a few little Prima's and some Bling to have more of a universal feel to them all. I did some inking with some Distress Ink and used Laura's idea of the ribbon closure on the box and I have myself a cute little set.
Here is a close up of all the cards
Saturday, March 27, 2010
A2 Card box tutorial by Chelsea
Hello guys and dolls...thanks for tuning in for my tutorial for Creative Clear Stamps on how to make a cute little A2 gift box. Finished product will look something like this (I might add a little sentiment on the bottom right):
Your template will look like this (the numbers are how long to make your cuts).
You will cut on the black lines.
Score on the red lines. If you plan on stamping this is probably your best time to do so.
Fold the flaps on the score lines like this
Adhere the front flap to the 2 side flaps
(Trim where needed) I've attached a circle with the cute little birdie from the Hello Hunny set and attached the magnet to the back of that.
Add the magnets or velcro as I did above. Add ribbon and embellies as you wish.
Fill with A2 cards and envies and you have the cutest little gift.
You will need:
1 sheet of 12x12 cardstock
paper cutter
scoring tool
score-tape or other strong adhesive
small magnets or velcro
embellies and stamps to decorate.
Your template will look like this (the numbers are how long to make your cuts).
You will cut on the black lines.
Score on the red lines. If you plan on stamping this is probably your best time to do so.
Fold the flaps on the score lines like this
Adhere the front flap to the 2 side flaps
(Trim where needed) I've attached a circle with the cute little birdie from the Hello Hunny set and attached the magnet to the back of that.
Add the magnets or velcro as I did above. Add ribbon and embellies as you wish.
Fill with A2 cards and envies and you have the cutest little gift.
Friday, March 26, 2010
Happy Friday!
Hi all! Chelsea here, reporting from the great state of South Dakota! I'm so thrilled to be part of DT3! I wanna thank Laura for picking me to join the team and all the little people that got me to where I am today...ha ha ok, that was my goofy Friday humor (or lack there of). I'm no comedian so I'll just jump right into why I'm here....to post a card made with CCS's rockin' stamps! WOO HOO!!! I used the Hooked on Fishing set for this card.
The poor little wormy just sitting there on his hook waiting to be some big fishes dinner. If you look closer, on the brown you can see the bobbers that I stamped in versa mark as well. This set is so versatile and fun. You must run, don't walk, right over to the store and grab yourself a Hooked on Fishing set. While your there pick up a few other things as well. Have a fantastic weekend!
Subscribe to:
Posts (Atom)